|Day 2| Creating a website to sell your music (MALOM)

Welcome back!
Last time, we covered the basics of making money with your music. The point of last week’s article was to give you some different monetization ideas that are possible for you to implement.
>> Click here to read last week’s article – Making a Living as a Musician?
Today we’re actually going to start making something!
As an artist, it is crucial to have your own website.
Yes. Twitter, Facebook, and other social networks are very powerful, BUT they are not something you should rely on 100%.
A website gives you control over everything. You can monetize it the way you want and you can design it to your liking.
Think of your website as a main headquarters to your business. You’ll still be on plenty social networks, but their main purpose will be to drive traffic to your website.
Setting up a website isn’t as hard as you might think.
Of course there will be a bit of a learning curve, but tools like WordPress will make it so much easier.
No coding knowledge will be required, you don’t have to be that tech-savvy of a person, and all of this can be done for a very low price.
What we’ll be doing today is setting up a website and customizing it. We won’t be implementing a store yet. We’ll save that for a later tutorial.
What you’ll learn today:
- Picking and buying a domain
- Purchasing web-hosting
- Installing and configuring WordPress
- Changing to a nicer-looking theme

Step 1: Picking a domain
If you already have an artist/band name, this step should be easy!
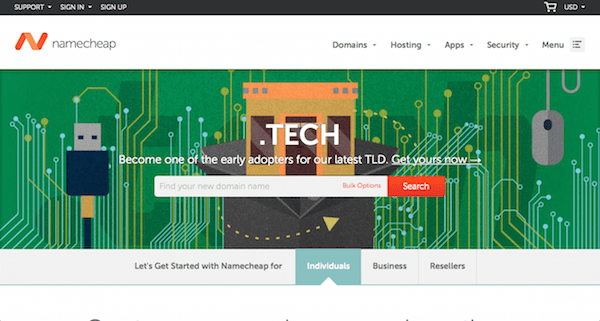
I’ve bought domains on a few different websites, but I found NameCheap to be the cheapest option. Feel free to compare around, but in 9/10 cases, I found NameCheap to have the lowest-priced domains.
To test if the domain you want is available, simply type it in the big search box on their home page and press enter.
.com domain names:
You’ll see a ton of different domain options that pop up from .org, to .net, to .io, to .xxx.
If you are in the US, you should always buy .com domains. They tend to rank better in the search engines and just sound more professional compared to the others.
If you live somewhere other than the US, you should purchase the domain that is most native to your country. For example, .co.uk domains would be best if you live in the UK.
Your desired domain name is taken?
If you run into the problem of having your domain name already taken by someone else, don’t worry!
A lot of artists who’s names are already registered just add a prefix or suffix to their name. For example, Kaskade had to register KaskadeMusic.com because Kaskade.com was taken.

Step 2: Purchasing and setting up hosting
Ok.
So we have our domain. All that means is that we own that space on the web. Now we need to find a service that will host all of our files.
You have a number of options when choosing hosting. My advice: don’t cheap out.
You’ll find a lot of ridiculous web hosts that charge a very low price to host your website. With these type of companies, you’ll usually run into A LOT of downtime with your site. There’s even a chance that your hosting would be more restricted and will result in your site running slower.
With Midi Lifestyle, I have always been on GoDaddy, BUT I believe it’s not the best option. From my experience and constant research, I’ve come to the conclusion that Bluehost is the way to go.
Why Bluehost?
At first, I was a bit hesitant with Bluehost. At the time I haven’t heard too much about it and wasn’t sure that it could be better than GoDaddy.
If you have any questions about Bluehost, they have a very easy-to-find chat feature. It let me ask all the questions I had about the service and get answers fast.
Which hosting plan should you choose?
Bluehost has a few different plans. You only really need to focus on either the shared hosting or the WordPress Hosting.
Keep in mind that on both plans you can install WordPress. The ‘Wordpress Hosting’ plan is just optimized for WordPress websites and will be a bit faster. I recommend starting out with shared hosting, just because it’s cheaper.
Linking Namecheap to Bluehost
Now you have to link Bluehost and Namecheap together.
First, you need to get some information off Bluehost. You need to know your site’s two name servers. You can find this information using this tutorial (just ignore step 5).
Copy the two different name servers you see. We’ll have to enter them in NameCheap.
The name servers should look something like:
- ns1.bluehost.com
- ns2.bluehost.com
(Keep in mind that your name server addresses might look different. This is just an example)
How to change name servers on NameCheap:
- Hover over your username in the top-left and click ‘Manage Domains’.
- Click on the domain you bought.
- Click on ‘Transfer DNS To Webhost’ (in the left sidebar)
- You’ll now see 5 separate fields to add name servers. You only need to add the 2 we got off Bluehost.
- Click save and you’re done!
Keep in mind it can take up to 12 hours to take effect. The longest it took one of my sites to transfer was around 10 minutes. Sometimes it happens immediately.
Once this is done, its time to install WordPress!
Step 3: Installing and configuring WordPress
The first thing you have to do is actually install WordPress on Bluehost. Follow the video above for a better instruction on how to do so.
After WordPress is installed, login to your site’s admin-panel by going to:
- yoursitename.com/wp-admin
Of course replace ‘yoursitename.com’ with your actual domain name. You might want to bookmark this page for easy access later.
Welcome to your dashboard!

Step 4: Changing to a nicer-looking theme
The default WordPress theme most likely isn’t something you’ll want to stick with. Word Press has a lot of free themes available. Feel free to browse through their selection. (You can get there under the appearance>>Themes menu. Then just click on ‘Add New’.)
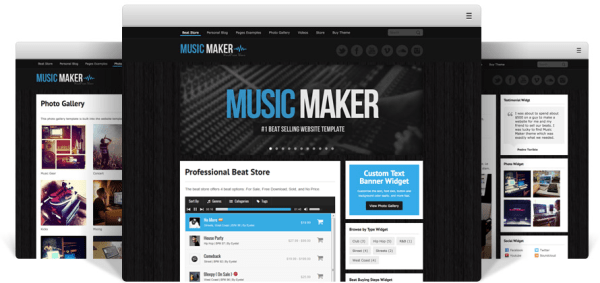
If you’re willing to invest in your site’s appearance, I highly recommend checking out the Music Maker Theme.
It is designed for beat makers, but will work great for any type of artists. You can sell music or even sell different types of licenses for your music.
Its an insanely clean-looking theme and has a built-in music selling platform. The Music Maker Theme takes all the difficulty out of tweaking your site to perfection and is packed with a ton of great features. If you’re still not convinced, you can checkout a demo version of the theme here.
If you don’t want to spend money right away and just want a presentable free theme, checkout WPMulti’s list of 50 wordpress themes for musicians and bands.
What we still need to do:
- Optimize the site for search engines
- Get a working payment system to sell music. (If you bought the Music Maker Theme, this step is already done!)
- Find other ways to monetize the site (ads, donations, affiliate marketing, etc)
Final Notes
And that concludes day 2 of MALOM!
If you have any questions or comments, please ask down below! Keep in mind that these MALOM articles will constantly be edited and improved.
Want more quality information?
Subscribe to our email list down below!

Leave a Comment