
Basic Midi Controller Build From Scratch Using Makey Makey
“Turn the whole world into a keyboard.”
The Makey Makey can help make building midi controllers easier than ever. This controller basically acts as a computer keyboard that can have each key assigned to do different functions.The Makey Makey can be used for anything from producing music to playing super mario bros!
What you will need:
- Makey Makey invention kit
- Buttons(Optional)
- Creativity!
- I have no links for you to buy creativity!
First glance:
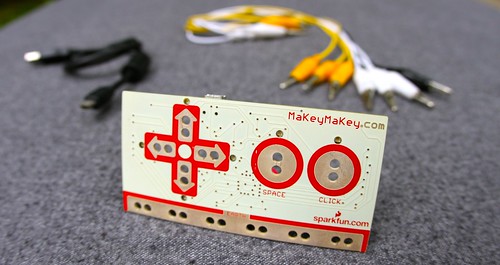
When you first buy this package, you will notice it comes with a few things. It includes a Makey Makey control board, a usb cable, and 4 alligator clips(2 white, 2 yellow).
To expand your capabilities, you could buy more alligator clips on Amazon for more midi buttons.
The one thing you should note is that this midi controller lacks of faders/knobs. Since this controller is emulating a computer keyboard, it only has buttons on it.
Don’t think that this limits your possibilities though! At the end of this article I will include some really creative videos that I enjoyed.
Note:
You don’t need the buttons that I provided a link to by any means. You could use anything as a button. Even a banana! The buttons are just nice to have because they could be useful for later projects and plus if you want to put this project into an enclosure, it would look a hell of a lot more professional!
How to Build:
- Attach one alligator clip into the arrow facing west(of course you can choose any of the designated holes. Just don’t use the earth holes. Those are for later).
- Attach the other end of the same alligator clip to any of the wire leads on a button.
- Now, attach a different wire(preferably a different color) to the ground holes.
- On that same ground wire, connect that to another lead on the button.

Testing:
Now to the fun part.
We are going to test our first midi controller on an online game. You could use any game of your choice, but for this I am using the online version of Doodle Jump.
Doodle Jump game link: http://www.agame.com/game/doodle-jump
We only attached one button onto the left arrow of the Makey Makey. Feel free to attach more buttons with any other wires that you have left. First off, connect the usb cable to the Makey Makey and then plug the other end of it into your computer. Now once you load up Doodle Jump, or whatever game you choose, press the button. You should see the game performing the same action as the left arrow would do on your keyboard.
(The possibilities are really endless with MakeyMakey! Pac-Man anyone?)

Awesome!
This is not exactly a midi controller. It is just a keyboard emulator. This doesn’t mean it can’t be used just like a midi controller though.
Mapping The Makey Makey To Software
I love Ableton Live. It’s what I use for producing music. I ‘ll be going over how to map the Makey Makey in Ableton.
1. Click on “Key” in the upper right hand corner of Ableton.
2. Click on a parameter of an effect, a clip, an assignable drum pad, etc.
3. Press a button that you connected to your Makey Makey.
4. Click “Key” in Ableton again to exit key-assign mode.
That’s it!
*UPDATE*
There is an awesome piece of software that can turn Makey Makey’s key presses into REAL midi data. You can read my review on it HERE.
Makey Makey Videos:
https://youtube.com/watch?v=wkPt9MYqDW0%3Frel%3D0
Leave a Comment
3 comments
Great article. I didn’t know building your own controller could actually be easy! This seems like a great beginner project and I can’t wait till mine comes in the mail:D
Good to hear Man! and good luck too! It’s a ton of fun!
I have read several excellent midi controller build articles here. Definitely value bookmarking
for revisiting. Very helpful for a newbie:)